< Orange Pi > ไฟกระพริบต้องมี สวิตส์กดๆต้องมา ด้วยภาษา Python [2]
ในตอนที่แล้ว เราได้แนะนำให้รู้จัก และวิธีการติดตั้ง Library ของ Python ที่ชื่อ WiringPi-Python-OP กันไปแล้ว ในตอนนี้ เราจะมาเริ่มต้นใช้งาน Library ตัวนี้กัน ด้วยการเขียนโปรแกรมควบคุม LED ผ่านสวิตซ์ แบบง่ายๆ
ก่อนอื่นเลย เราคงต้องเตรียมวงจรที่จะใช้ทดสอบเสียก่อน โดยจะใช้ I/O pin ที่ 0-7 เป็น Output และ 8-15 เป็น Input
วงจร Input นั้นเป็นแบบ Active Low ดังนั้นสถานะปกติจะเป็น 1 เสมอ และวงจร Output จะเป็นแบบ Active Low นั่นคือ ไฟจะติดสว่างเมื่อเราสั่งให้ Output เป็น 0 ซึ่งทำให้เราสามารถใช้ค่าที่อ่านได้จากสวิตซ์ ไปสั่งการทำงานของหลอดไฟได้โดยตรง เช่นกัน

โดย I/O Pinout เราสามารถอ้างอิงจาก Pinout ที่ได้จากคำสั่ง gpio readall ได้เลยครับ
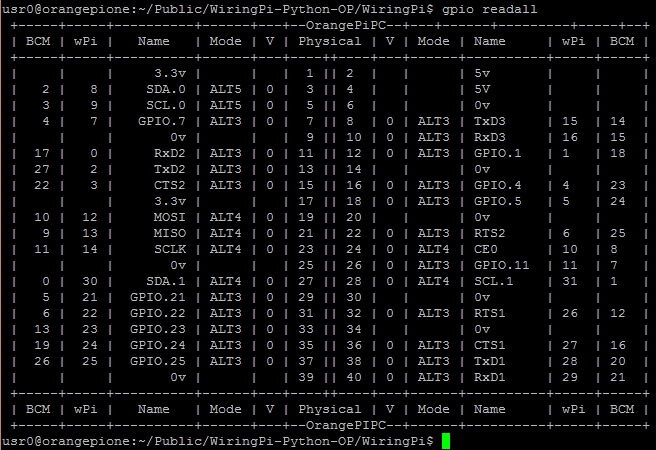
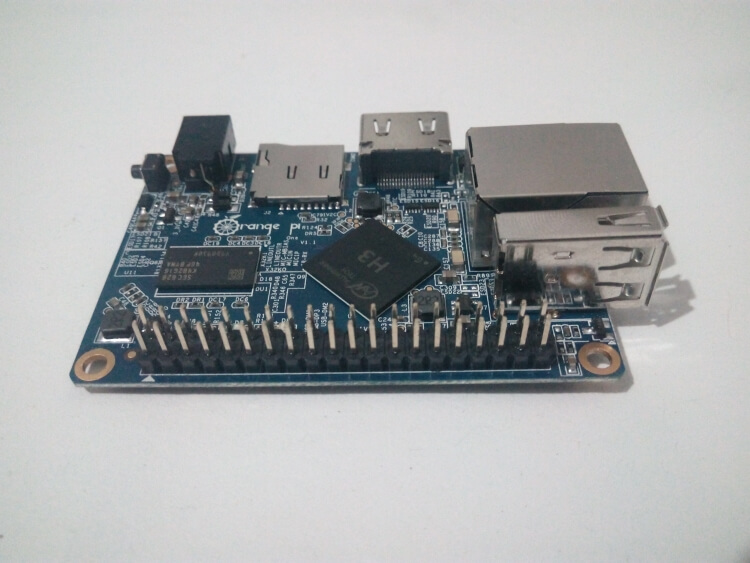
ซึ่งขา 1 บนตาราง Physical ข้างต้นจะอยู่ที่มุมนอกด้านตรงข้ามกับ Ethernet Port และ USB Port ซึ่งจะเห็นลูกศรชี้บอกตำแหน่งอยู่ ส่วนขา I/O นั้น จะเรียงชื่อตาม ชื่อขาบนตารางของ wPi เช่นขา I/O Pin 0 นั้นจะอยู่ที่ขา 11 ของ I/O Port
เมื่อจัดการเรื่องวงจรเสร็จสิ้นแล้ว เราก็มาเริ่มต้นเขียนโค้ดกันได้ เริ่มจากเปิด Geany ขึ้นมา
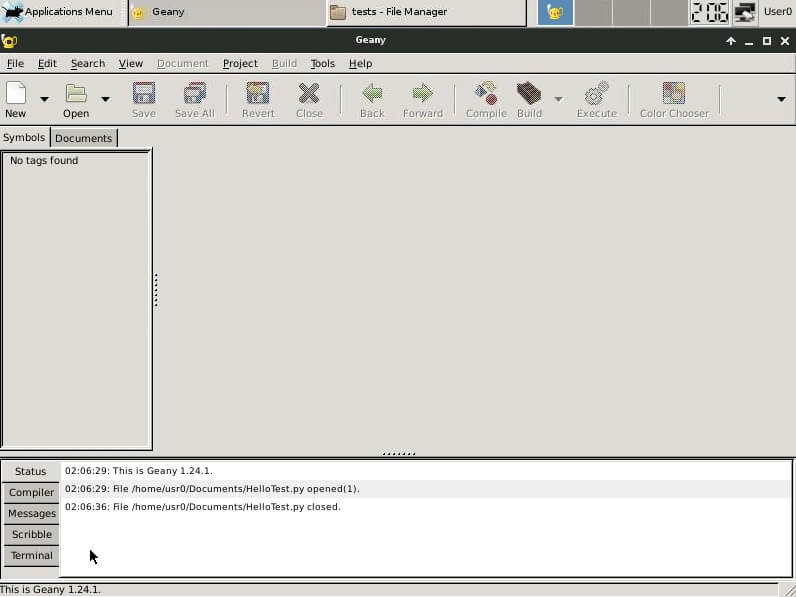
แล้วเลือกเมนู New -> main.py เพื่อสร้างไฟล์ Python ของเรา

จากนั้นก็เพิ่มโค้ดนี้เข้าไปในไฟล์ main.py
ส่วนนี้เพิ่มเข้าไปก่อนบรรทัด def main():
24 25 26 27 28 29 30 31 32 33 | # GPIO test # 0-7 Output # 8-15 Input # import wiringpi to link to WiringPi-Python-OP # I/O Pinout According to $gpio readall import wiringpi pin = [0,0,0,0,0,0,0,0] |
และส่วนนี้เพิ่มเข้าไปหลัง def main():
34 35 36 37 38 39 40 41 42 43 44 45 46 47 48 49 50 51 52 53 54 55 56 57 58 59 60 61 62 63 64 65 66 67 68 69 70 71 72 73 74 75 76 77 78 79 80 81 82 83 84 85 86 87 88 89 90 91 92 93 94 95 96 | wiringpi.wiringPiSetup() print "Set GPIO Mode" wiringpi.pinMode(0,1) wiringpi.pinMode(1,1) wiringpi.pinMode(2,1) wiringpi.pinMode(3,1) wiringpi.pinMode(4,1) wiringpi.pinMode(5,1) wiringpi.pinMode(6,1) wiringpi.pinMode(7,1) wiringpi.pinMode(8,0) wiringpi.pinMode(9,0) wiringpi.pinMode(10,0) wiringpi.pinMode(11,0) wiringpi.pinMode(12,0) wiringpi.pinMode(13,0) wiringpi.pinMode(14,0) wiringpi.pinMode(15,0) i = 0 while 1: print "turn : " , i pin[0] = wiringpi.digitalRead(8) #read Pin8 to pin pin[1] = wiringpi.digitalRead(9) #read Pin9 to pin pin[2] = wiringpi.digitalRead(10) #read Pin10 to pin pin[3] = wiringpi.digitalRead(11) #read Pin11 to pin pin[4] = wiringpi.digitalRead(12) #read Pin12 to pin pin[5] = wiringpi.digitalRead(13) #read Pin13 to pin pin[6] = wiringpi.digitalRead(14) #read Pin14 to pin pin[7] = wiringpi.digitalRead(15) #read Pin15 to pin wiringpi.digitalWrite(0,pin[0]) #set Pin0 by pin[0] value wiringpi.digitalWrite(1,pin[1]) #set Pin1 by pin[1] value wiringpi.digitalWrite(2,pin[2]) #set Pin2 by pin[2] value wiringpi.digitalWrite(3,pin[3]) #set Pin3 by pin[3] value wiringpi.digitalWrite(4,pin[4]) #set Pin4 by pin[4] value wiringpi.digitalWrite(5,pin[5]) #set Pin5 by pin[5] value wiringpi.digitalWrite(6,pin[6]) #set Pin6 by pin[6] value wiringpi.digitalWrite(7,pin[7]) #set Pin7 by pin[7] value print "input 0 " , wiringpi.digitalRead(0) #Show Pin0 Status print "input 1 " , wiringpi.digitalRead(1) #Show Pin1 Status print "input 2 " , wiringpi.digitalRead(2) #Show Pin2 Status print "input 3 " , wiringpi.digitalRead(3) #Show Pin3 Status print "input 4 " , wiringpi.digitalRead(4) #Show Pin4 Status print "input 5 " , wiringpi.digitalRead(5) #Show Pin5 Status print "input 6 " , wiringpi.digitalRead(6) #Show Pin6 Status print "input 7 " , wiringpi.digitalRead(7) #Show Pin7 Status print "input 8 " , wiringpi.digitalRead(8) #Show Pin8 Status print "input 9 " , wiringpi.digitalRead(9) #Show Pin9 Status print "input 10 " , wiringpi.digitalRead(10) #Show Pin10 Status print "input 11 " , wiringpi.digitalRead(11) #Show Pin11 Status print "input 12 " , wiringpi.digitalRead(12) #Show Pin12 Status print "input 13 " , wiringpi.digitalRead(13) #Show Pin13 Status print "input 14 " , wiringpi.digitalRead(14) #Show Pin14 Status print "input 15 " , wiringpi.digitalRead(15) #Show Pin15 Status if i > 16 : #Reset i counter after more than 16 i = 0 else : i = i+1 #Increase i counter wiringpi.delay(100) #delay 100ms by delay function in wiringPi |
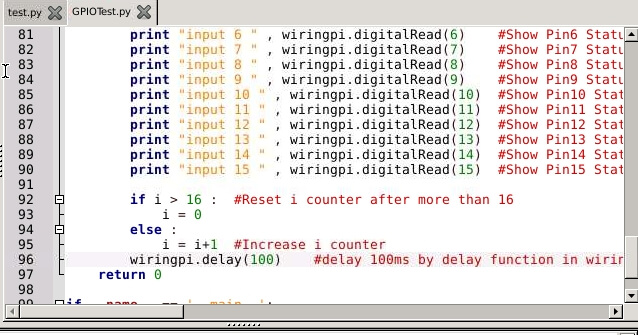
เมื่อรวมแล้ว จะได้โค้ดทั้งหมดแบบนี้
1 2 3 4 5 6 7 8 9 10 11 12 13 14 15 16 17 18 19 20 21 22 23 24 25 26 27 28 29 30 31 32 33 34 35 36 37 38 39 40 41 42 43 44 45 46 47 48 49 50 51 52 53 54 55 56 57 58 59 60 61 62 63 64 65 66 67 68 69 70 71 72 73 74 75 76 77 78 79 80 81 82 83 84 85 86 87 88 89 90 91 92 93 94 95 96 97 98 99 100 | #!/usr/bin/env python # -*- coding: utf-8 -*- # # GPIOTest.py # # Copyright 2016 user0 <usr0@orangepione> # # This program is free software; you can redistribute it and/or modify # it under the terms of the GNU General Public License as published by # the Free Software Foundation; either version 2 of the License, or # (at your option) any later version. # # This program is distributed in the hope that it will be useful, # but WITHOUT ANY WARRANTY; without even the implied warranty of # MERCHANTABILITY or FITNESS FOR A PARTICULAR PURPOSE. See the # GNU General Public License for more details. # # You should have received a copy of the GNU General Public License # along with this program; if not, write to the Free Software # Foundation, Inc., 51 Franklin Street, Fifth Floor, Boston, # MA 02110-1301, USA. # # # GPIO test # 0-7 Output # 8-15 Input # import wiringpi to link to WiringPi-Python-OP # I/O Pinout According to $gpio readall import wiringpi pin = [0,0,0,0,0,0,0,0] def main(): wiringpi.wiringPiSetup() print "Set GPIO Mode" wiringpi.pinMode(0,1) wiringpi.pinMode(1,1) wiringpi.pinMode(2,1) wiringpi.pinMode(3,1) wiringpi.pinMode(4,1) wiringpi.pinMode(5,1) wiringpi.pinMode(6,1) wiringpi.pinMode(7,1) wiringpi.pinMode(8,0) wiringpi.pinMode(9,0) wiringpi.pinMode(10,0) wiringpi.pinMode(11,0) wiringpi.pinMode(12,0) wiringpi.pinMode(13,0) wiringpi.pinMode(14,0) wiringpi.pinMode(15,0) i = 0 while 1: print "turn : " , i pin[0] = wiringpi.digitalRead(8) #read Pin8 to pin pin[1] = wiringpi.digitalRead(9) #read Pin9 to pin pin[2] = wiringpi.digitalRead(10) #read Pin10 to pin pin[3] = wiringpi.digitalRead(11) #read Pin11 to pin pin[4] = wiringpi.digitalRead(12) #read Pin12 to pin pin[5] = wiringpi.digitalRead(13) #read Pin13 to pin pin[6] = wiringpi.digitalRead(14) #read Pin14 to pin pin[7] = wiringpi.digitalRead(15) #read Pin15 to pin wiringpi.digitalWrite(0,pin[0]) #set Pin0 by pin[0] value wiringpi.digitalWrite(1,pin[1]) #set Pin1 by pin[1] value wiringpi.digitalWrite(2,pin[2]) #set Pin2 by pin[2] value wiringpi.digitalWrite(3,pin[3]) #set Pin3 by pin[3] value wiringpi.digitalWrite(4,pin[4]) #set Pin4 by pin[4] value wiringpi.digitalWrite(5,pin[5]) #set Pin5 by pin[5] value wiringpi.digitalWrite(6,pin[6]) #set Pin6 by pin[6] value wiringpi.digitalWrite(7,pin[7]) #set Pin7 by pin[7] value print "input 0 " , wiringpi.digitalRead(0) #Show Pin0 Status print "input 1 " , wiringpi.digitalRead(1) #Show Pin1 Status print "input 2 " , wiringpi.digitalRead(2) #Show Pin2 Status print "input 3 " , wiringpi.digitalRead(3) #Show Pin3 Status print "input 4 " , wiringpi.digitalRead(4) #Show Pin4 Status print "input 5 " , wiringpi.digitalRead(5) #Show Pin5 Status print "input 6 " , wiringpi.digitalRead(6) #Show Pin6 Status print "input 7 " , wiringpi.digitalRead(7) #Show Pin7 Status print "input 8 " , wiringpi.digitalRead(8) #Show Pin8 Status print "input 9 " , wiringpi.digitalRead(9) #Show Pin9 Status print "input 10 " , wiringpi.digitalRead(10) #Show Pin10 Status print "input 11 " , wiringpi.digitalRead(11) #Show Pin11 Status print "input 12 " , wiringpi.digitalRead(12) #Show Pin12 Status print "input 13 " , wiringpi.digitalRead(13) #Show Pin13 Status print "input 14 " , wiringpi.digitalRead(14) #Show Pin14 Status print "input 15 " , wiringpi.digitalRead(15) #Show Pin15 Status if i > 16 : #Reset i counter after more than 16 i = 0 else : i = i+1 #Increase i counter wiringpi.delay(100) #delay 100ms by delay function in wiringPi return 0 if __name__ == '__main__': main() |
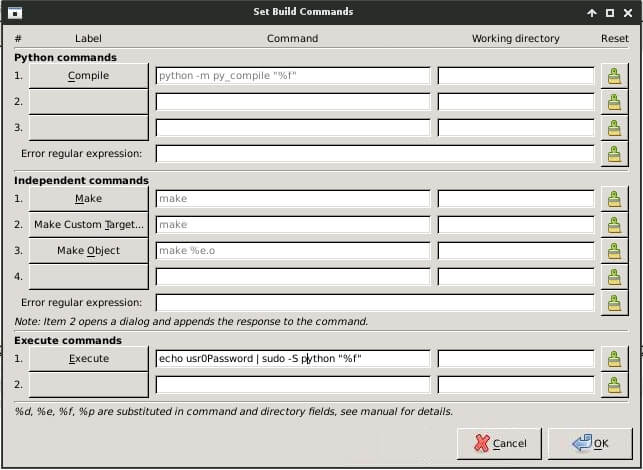
และก่อนที่รันโค้ดชุดนี้ เราจำเป็นที่ต้องตั้งให้โค้ดนี้รันในสถานะ root ด้วยการเพิ่มคำสั่ง sudo เข้าไปในส่วน Execute โดยเข้าไปที่ Build -> Set Build Command
 และเพิ่มคำสั่ง echo usr0Password | sudo -S เข้าไปก่อน python “%f” เพื่อให้ระบบใส่รหัสผ่านให้เราอัตโนมัตตอนที่เรารันโค้ด รวมแล้วจะเป็น echo usr0Password | sudo -S python “%f” แล้วกดโอเค
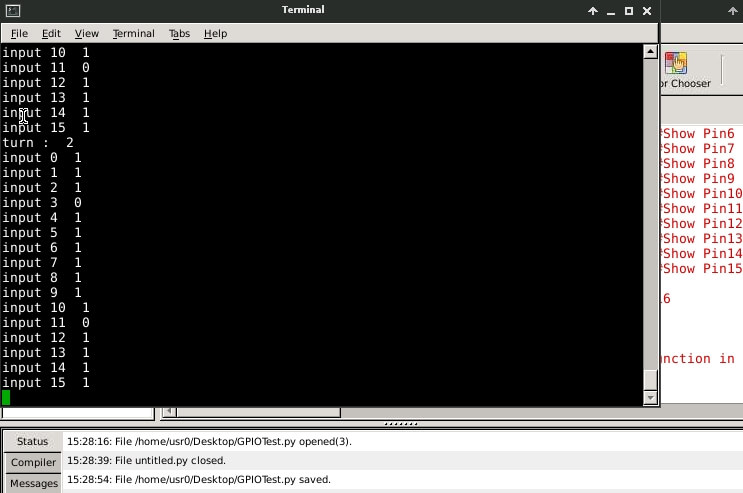
จากนั้นเราก็มาลอง Execute โค้ดของเรากัน หากทุกอย่างทำงานถูกต้อง จะมี console แสดงสถานะของ Pin ที่เรา print ไว้ปรากฏขึ้นมา
เมื่อเรากดสวิตซ์ ไฟ LED ก็จะติด ตามที่เราได้เขียนโปรแกรมไว้
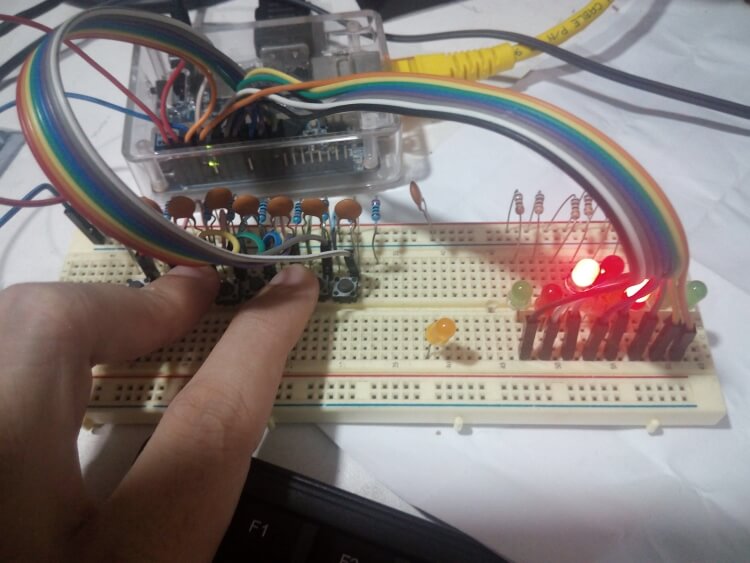
และแล้วเราก็ได้เริ่มทำไฟกระพริบบน Orange Pi ด้วย Python ได้เสียที
เดี๋ยวคราวหน้าเราจะลองใช้ฟังค์ชั่นอื่นๆ และโมดูลอื่นๆ ของ WiringPi-Python-OP กันครับ
